Tuesday, January 8, 2013

Scrappy Trips progress

Progress on my Scrappy Trips Around the World quilt: I have 7 blocks finished and 13 strip-pieced, ready to be cut and pieced again!

In case this is helpful at all - a couple of notes. I chain-piece the three sets of two strips and press them. (You can see I only press the outer two, as I found if I press the centre one already it's hard to fold accurately to sew into a tube later.)


Then I sew the three pieces together into the 6-strip block. Here's my stack of 13, pinned and ready to sew. I chain-pieced so I'm not clipping near as many threads and don't have to deal with snarls at the beginning of each!


Big stack of 6-strip blocks, ready to press.


No pic of pressing - I press to end up like this, except I don't press the centre seam, to make it easier to fold in half. (pic posted by Lorena in Sydney in the discussion on the Scrappy Trip-Along Flickr group)


Then fold each 6-strip block in half and sew to make tubes! I sewed these up last night:


I'm hoping to get a couple of these at least cut apart, maybe sewn up today!

Saturday, January 5, 2013

Scrappy Trip-Along

I'm joining my first quilt-along!  It's the Scrappy Trip Around the World. The finished projects look intimidating, but I made two blocks easily today!! I love that I'm using up random "ugly" and old fashioned fabrics, plus the act that there's no planning! The only thing I'm making sure of is to do each centre dark.  The tutorial over at QuiltVille is great.  I especially wouldn't have thought to press the way she suggests - makes it so much easier!


Tuesday, January 1, 2013

Quick Quilted Coaster tutorial

Finally!!  A tutorial - well, sort of one - Delores did a pretty good tutorial with the same idea, for potholders.  Basically followed her tutorial, except made a set of coasters instead!  Any ideas for a name for these? They sort of look like a pinwheel, but not exactly...


 So here is my step by step - hopefully it's helpful, even though Sweet P's is a great tutorial for potholders.  :)


 Materials to make a 4"x4" coaster:

  • three coordinating fabrics
  • small square of batting or fusible fleece

  1. Cut two squares 4.5"x4.5" of each of three fabrics. Sandwich a square of batting between your bottom and "window" fabrics (base). Fold the other four squares in half to form triangles and press.

  2. Lay one triangle on the base with the two raw sides lined up with raw edges of the base. Overlap the second triangle, then the other two in turn, around the base. You will tuck the last triangle under the first one.

  3. Pin each edge and corner in place, being sure to have all raw edges even.

  4. Sew around the square with 1/4" seam allowance, then clip the corners.

  5. Turn the coaster right side out through the centre and push out the corners.

  6. Press.

  7. Fold the edge of each triangle back on itself to show the base fabric in a little window. Pin them down.

  8. Topstitch on the folded edges. You can either topstitch both edges of each fold, or only the inner one.
And DONE!   :)

Monday, December 31, 2012

2012 in Review


Some (probably most) of 2012's craftiness.  Happy New Year!


Wednesday, December 26, 2012

"Read" Book Bag

Merry Christmas!!  I sure had fun with gifts this Christmas.  Not all handmade, but there were a few - the doll quilt for Abigail, and this:

For my in-laws' gift exchange, I pulled my SILs name. She is working her first year as a teacher. I found this pattern and thought it was perfect!


This was so much fun! I added selvedges to the book spines as titles. Some of them are the fabrics they were cut from, even (I'm such a nerd!).  Suzanne had the idea for the selvedges - most of them are from her stash!


The other side of the bag, and my first time trying English paper piecing:


Inside pocket: apples for a teacher!

Wednesday, December 19, 2012

Teacher Zip Pouch

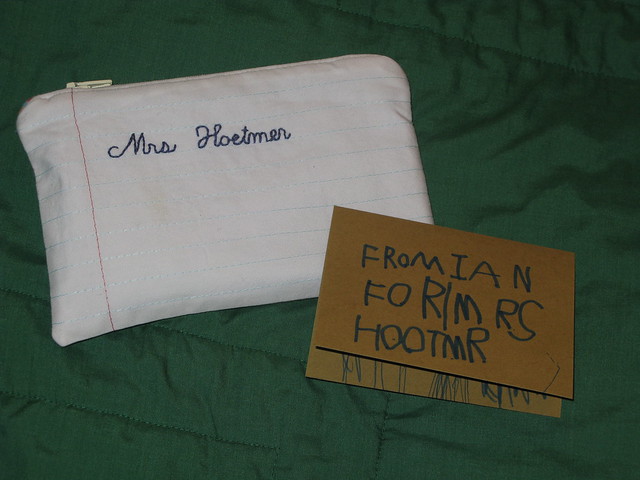
Ian wanted to give his teacher something for Christmas, so i made a little "ruled paper" pouch. (idea for the "paper" from here)  I interfaced a piece of white fabric and then sewed lines at 1/2" intervals in light blue thread across, and another line in pink at 1 1/4" from the side. Then I used a washable marker to write the teacher's name and then embroidered in a backstitch.    (Ian made the card - it's his own spelling! lol)


The back is apples - for a teacher! :D   It makes me happy. I used FlossieTeaCakes tutorial for a zipper pouch - good tutorial. The one thing I'd change if I did it again would be the zipper end covers. They turned out a touch bulky.  Ian bought a little notebook and pen to go with the pouch and is very excited to give it to her tomorrow.

Friday, December 7, 2012

Doll Whirlygig

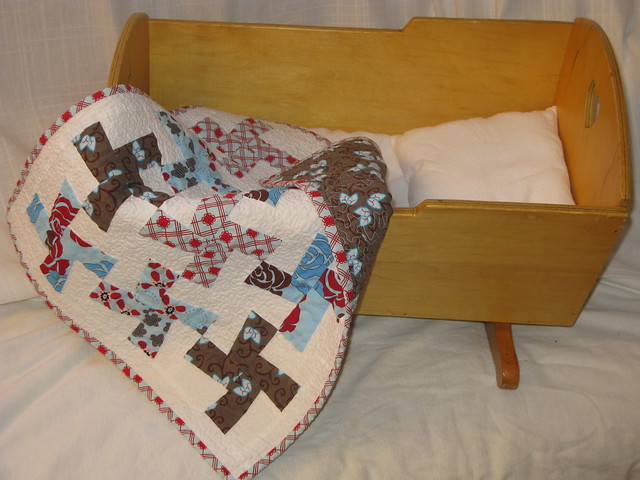
First finished quilt!! Ok, so it's a doll quilt. But still, I sure learned a lot doing this. Such as to count. I made twice as many whirlygig blocks as I needed, somehow...


I used more of the (never-ending) Genenvieve line by Amy Hamberlin. It's for Abigail for Christmas! I am so excited to give her the beautiful doll cradle my dad made for me when I was 3. I also made a little mattress, pillow and sheet for it.


The whirlygig block is from the tutorial here, which was great - no template and no trimming! I also tried out my first free-motion quilting. My machine wasn't too happy about that - it kept having tension difficulties and nesting on the back.


I tried something I've seen my friend Suzanne do and made the back interesting: